XML stands for eXtensible Markup Language and is a common data storage and transmission format. It’s widely used across the web and in many apps and software.
It’s a great data structure for computers to read, but it’s a bit less accessible for a human to read.
In this post we’ll take a look at how to import an XML file into Excel and turn it into a more friendly table format. Excel has support for XML files and it’s actually really easy to import and covert them to tables using power query.
You can download the example files used in this post here.
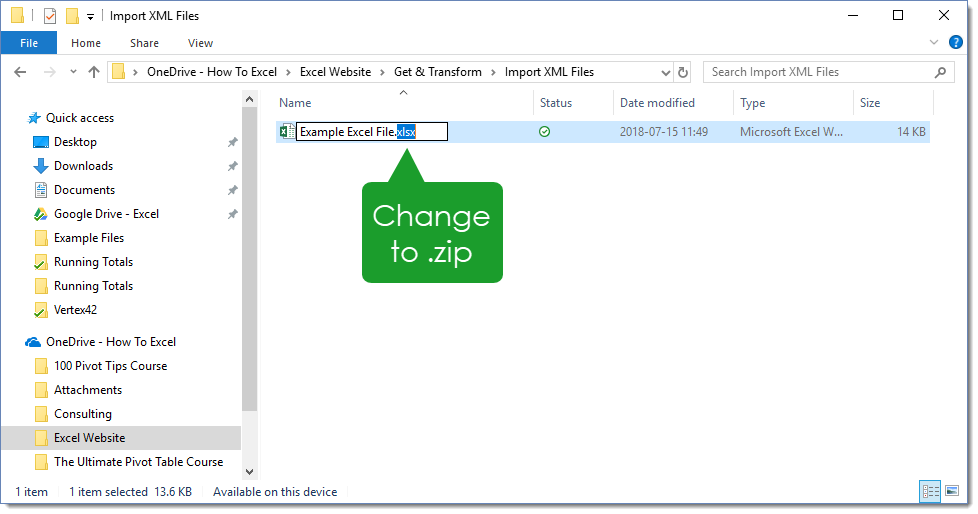
You don’t need to look very far to find an example, Excel files are really just a collection of XML files in a zip folder.

Try it for yourself by taking any Excel file and changing the extension from .xlsx to .zip and then exploring the files in the zip folder. You’ll see a ton of XML files. You can open any of the XML files in your text editor of choice to view the inner workings of an Excel file.
Another common example can be found across the web. Most websites have a sitemap.xml file which is an XML file of the website’s link structure. This is literally a map of the website for bots like Google to crawl and index.
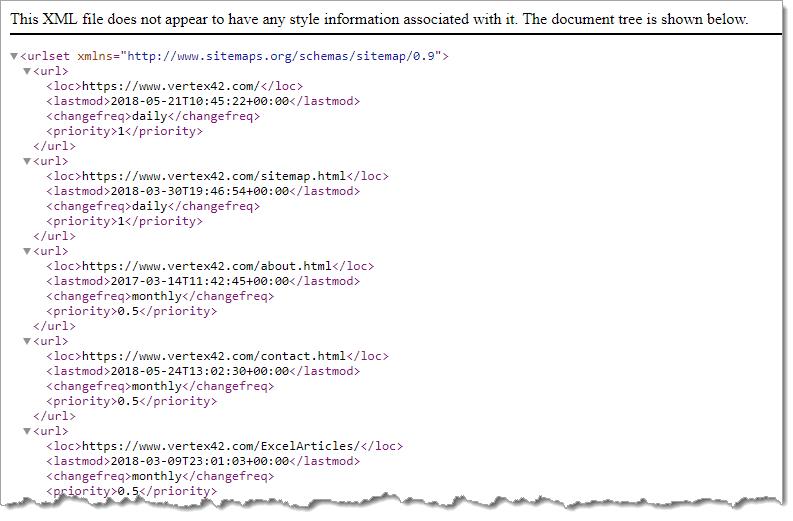
Check out the XML sitemap on one of my favourite Excel sites, https://www.vertex42.com/sitemaps/pages.xml. It lists all the pages on the site and includes information about when the page was last updated, how often the page is updated and how much weight search engines should give that page.

In this example we will use a simple XML file containing mock contact information with names, emails, cities and countries.
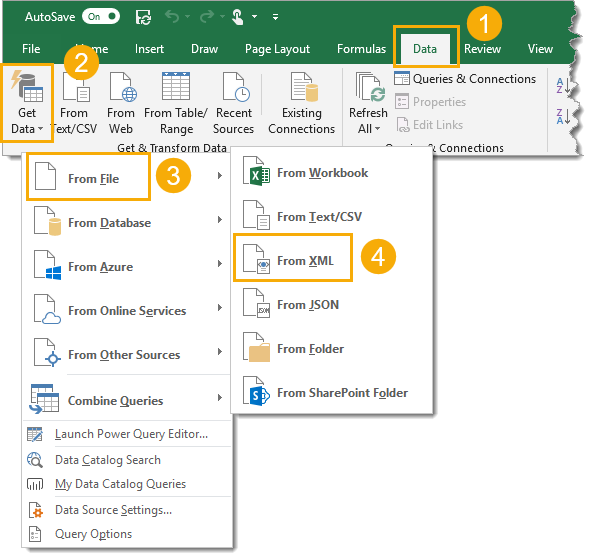
We can quickly create a new query that imports the XML file into Excel.
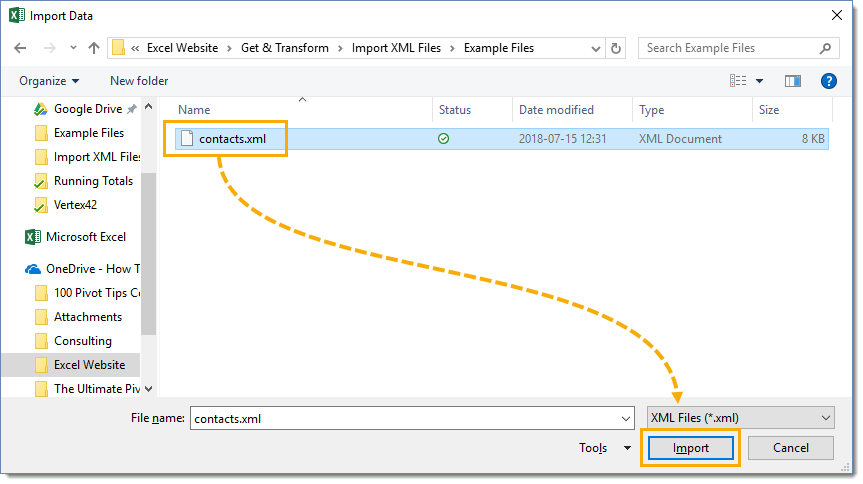
This will open a file selection window and we can navigate to the location of the XML file and press the Import button.
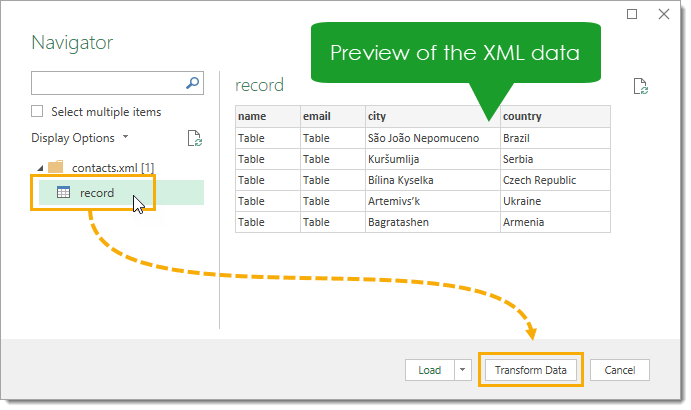
The Navigator window will now open and we can see a preview of the data from the XML file. Notice that it’s in a nice table format? That’s automatically done by power query.
Since the Name and Email fields in the XML data contain sub-fields we see Table listed underneath the column headings in the preview. For example, the Name field contains a First and Last field for the first and last names of the person. If our data had a simple structure without any sub-fields, we could skip the query editor and press the Load button to directly load the data into the workbook.
To expand these tables out in the power query editor, press the Transform Data button.
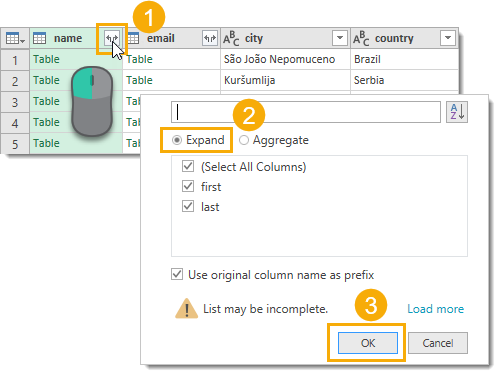
In the query editor, click on the expand column toggle for the Name column which contains the Table elements. Choose the Expand option and press the OK button.

Repeat the process for the Email column as well. Depending on the data structure, we may need to do this several times.
Now our data is ready to be loaded into a table in the workbook.
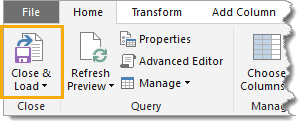
Go to the Home tab in the query editor and press the the Close & Load button to load the data into a table in the workbook.
XML data is a very common format. You’re likely to come across it sooner or later if you work with data.
It can be hard to interpret what’s going on in an XML file, but luckily Excel can handle this type of data with ease.
In a few clicks, we can use power query to get our XML data into a nice table format.
John is a Microsoft MVP and qualified actuary with over 15 years of experience. He has worked in a variety of industries, including insurance, ad tech, and most recently Power Platform consulting. He is a keen problem solver and has a passion for using technology to make businesses more efficient.
Subscribe for awesome Microsoft Excel videos 😃
👉 Find out more about our Advanced Formulas course!